


SOLUTION DETAILS
2026-01-16
How to Accurately Test Thermal Conductivity of 90×90×190mm Porous Hollow Clay Bricks (+Avoid 3 Critical Errors)
For construction material labs and manufacturers, testing the thermal conductivity of 90×90×190mm porous hollow clay bricks is a common yet challenging task. This brick’s small size (mismatched with standard 300×300mm tester chambers) and fragile porous structure often lead to unreliable data, which risks project non-compliance and quality disputes.
In this guide, we’ll share a step-by-step process compliant with GB/T 10294 (Chinese national standard) and ASTM C518 (international standard), helping you achieve precise results with an error margin of ≤3%. Whether you’re testing for building insulation or quality control, this method ensures your data is trustworthy.
Why Accurate Thermal Conductivity Testing Matters for Hollow Clay Bricks
Porous hollow clay bricks are widely used in wall insulation and energy-saving buildings, where thermal conductivity directly determines insulation performance and energy efficiency. Inaccurate data can lead to:
-
Failed compliance with national energy-saving standards for buildings;
-
Increased construction costs due to incorrect insulation layer design;
-
Quality complaints from clients and damaged brand reputation.
The key to avoiding these issues lies in addressing three core challenges: moisture interference, size mismatch, and structural damage to the brick’s holes.
Step-by-Step Guide to Accurate Testing
1. Pre-Treat Samples: Eliminate Moisture to Avoid False High Readings
Moisture is the biggest enemy of porous brick testing. Water has a thermal conductivity of 0.6 W/(m·K) — 1.3 times higher than that of dry hollow clay bricks (typically 0.4–0.5 W/(m·K)). Even trace moisture in the holes can skew results by 15% or more.
Correct pre-treatment process:
-
Place 9 same-batch 90×90×190mm bricks into a constant-temperature drying oven (capacity: 50–100L, to ensure the 9 bricks can be placed in a single layer without stacking, guaranteeing uniform drying via sufficient ventilation) set to 105±2℃;
-
Weigh the bricks in batches every 2 hours using a precision electronic balance (accuracy ≥0.0001g) until the weight difference of each brick between two consecutive measurements is ≤0.1% — this indicates constant weight;
-
Immediately transfer the dried 9 bricks to a desiccator to cool to room temperature (23±2℃) to prevent reabsorption of moisture from the air. Ensure the bricks remain intact and free of hole damage during transfer.
2. Sample Preparation: Fit 90mm Bricks to 300mm Tester Chambers (Detailed Operation)
Most thermal conductivity testers adopt a 300×300mm standard chamber, while the 90×90×190mm porous hollow clay brick is significantly smaller. Improper sample preparation (such as random stacking, uneven gap filling, or structural damage) will create air pockets (thermal conductivity of air: 0.023 W/(m·K)) or change the brick’s porous structure, leading to test errors exceeding 10%. The following is a detailed, repeatable preparation process:
-
3×3 Combined Stacking with Custom Fixture: Take 9 same-batch dried bricks (ensuring no cracks or hole damage) and place them on a flat marble platform. Use a custom 270×270mm positioning frame (inner size matching 3×3 bricks) to align the bricks tightly—each brick’s edges must be flush with the frame, and no gaps between adjacent bricks are allowed. After stacking, fix the combined sample with a custom clamp that features neat edges. The custom clamp not only prevents displacement during subsequent operations but also ensures the combined sample has uniform, neat edges, eliminating the need for additional trimming. This stacking method minimizes the gap with the 300mm chamber (only 15mm per side), reducing the difficulty of gap filling.
-
Gap Filling with Same-Material Mortar: First, prepare the filling mortar—mix the same clay as the brick with clean water at a mass ratio of 3:1 to make a paste (consistency: no flow when applied, able to adhere to the brick surface). Before filling, use masking tape to cover the outer edges of the brick holes to prevent mortar from entering the holes and changing the porous structure. Then, use a special joint filler to fill the gaps between bricks and between the combined sample and the tester chamber: fill the gaps layer by layer (each layer thickness ≤2mm) and compact with a small trowel to eliminate internal air bubbles. After filling, scrape the surface with a scraper to make it flush with the combined sample’s surface. Finally, remove the masking tape and place the sample in a room-temperature environment (23±2℃, humidity 50±5%) for 24 hours of natural curing to ensure the mortar is fully bonded.
-
Final Inspection Before Testing: After curing, check the combined sample for loose mortar, air bubbles, or surface unevenness. If any defects are found, repair them with a small amount of mortar and cure for another 2 hours. Then, use a digital caliper (accuracy 0.01mm) to measure the combined sample’s length, width, and thickness at 10 evenly distributed points—ensure the size deviation is ≤0.1mm, and the surface flatness (measured by a straightedge) is ≤0.05mm. The thickness value will be used as the core parameter for subsequent thermal conductivity calculation.
3. Testing with Steady-State Plate Tester (Gold Standard for Building Materials)
For porous hollow clay bricks, the steady-state plate method (compliant with GB/T 10294 and ASTM C518) is preferred over transient methods, as it delivers more stable and repeatable results for low-thermal-conductivity materials.
Testing process:
-
Calibrate the tester with a standard clay brick sample (known thermal conductivity) before testing — this eliminates system errors from the instrument;
-
Apply a thin layer of thermal conductive silicone (thickness <0.1mm) to both sides of the combined sample. This fills micro-gaps between the sample and the tester’s hot/cold plates, reducing contact thermal resistance;
-
Place the sample into the chamber and apply a light pressure of 0.05–0.1MPa. This ensures tight contact without crushing the brick’s holes;
-
Set test parameters: Temperature = 23±2℃ (room temperature, matching actual application conditions), temperature difference between hot and cold plates = 20℃ (optimized for porous hollow clay bricks, balancing testing efficiency and data stability);
-
Wait for thermal steady state: Monitor heat flux and temperature values — when fluctuations are ≤0.5% for 30 consecutive minutes, the sample reaches thermal equilibrium. Record the thermal conductivity reading.
Critical Errors to Avoid
Even with the correct process, small mistakes can compromise data accuracy. Below are the three critical errors and corresponding avoidance methods to ensure your test results are reliable:
-
Moisture Interference Error: This is the primary error in porous brick testing. Residual moisture in the brick holes has a much higher thermal conductivity (0.6 W/(m·K)) than dry brick (0.4–0.5 W/(m·K)), which can lead to a false high reading by more than 15%. → Avoidance Method: Strictly follow the pre-treatment process — dry the 9 bricks in a 105±2℃ oven (50–100L capacity, single-layer placement) until constant weight (consecutive weight difference of each brick ≤0.1%), then immediately transfer to a desiccator to cool to room temperature (23±2℃). Do not expose the dried bricks to air for a long time to prevent reabsorption of moisture.
-
Sample Preparation Structure Damage/Gap Error: Improper operations such as random stacking without positioning, loose fixing of the custom clamp (causing edge irregularity), uneven mortar filling, or mortar seeping into holes will change the brick’s porous structure or form air pockets (thermal conductivity of air: 0.023 W/(m·K)), resulting in an error exceeding 10%. → Avoidance Method: Use a 270×270mm positioning frame for 3×3 stacking of the 9 dried bricks to ensure alignment; fix the combined sample firmly with a custom clamp (with neat edges) to maintain edge regularity, eliminating trimming needs; prepare mortar at a clay-water ratio of 3:1, use masking tape to cover holes before filling, and fill layer by layer (each layer ≤2mm) to eliminate air bubbles. Conduct a final inspection after curing to ensure no loose mortar or surface unevenness.
Share


Feature Product
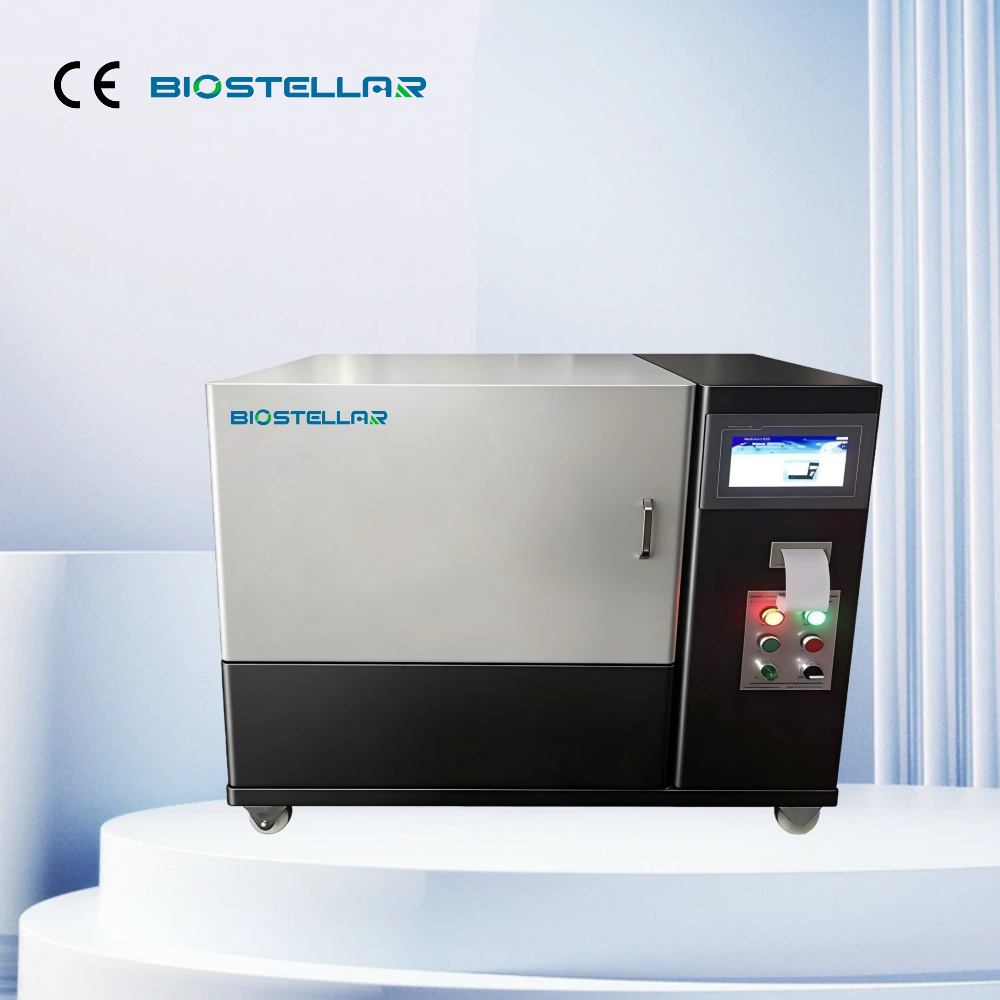
BS-DRS300 Heat Flow Meter Thermal Conductivity Tester
It is mainly used to test the thermal conductivity, thermal resistance of insulation materials, glass, fiber, foam and so on.
Explore more
SEND INQUIRY

Mailbox
stellawang@biostellarlab.cn

+86-15666095066

+86-15666095066

Adress
HanYu Gold Valley.The Intersection Of 10 Run
Road And South ShunHua Road High-Tech
Zone.JiNan Shandong Province CHINA